
Many photographers publish their images on their website or on social networks without really worrying about protecting them, exposing them to the risk of being copied or misappropriated by “image thieves“.
While this does not have any consequences when it comes to personal or confidential re-use, it becomes more problematic when it comes to commercial sites or influencers who use it to make their own money from other people’s work.
How can you dissuade certain visitors from borrowing your images from your site, or directly from the results of a search engine, in order to re-use them elsewhere on the Internet?
In this first tutorial in our series on image theft on the Internet, from the A Kom Z creative studio based in Lyon, France, you will find 5 basic actions you can take on your images before putting them online and 5 advanced protection techniques you can implement on your website.
Our 10 tips for protecting your images from theft on your website
- Add one or more visible watermarks to each image.
- Include a copyright notice in the metadata for all published images.
- Clearly display copyrights.
- Limit the pixel size of images posted online.
- Alter the intrinsic quality of images
- Overlay an invisible layer on top of an image to prevent direct recording.
- Divide an image into several superimposed parts.
- Prevent direct access to images from other sites.
- Block image referencing completely.
- Block AI training on your images.
1- Watermark a signature with your name or logo
Posting images on the internet without a watermark is like leaving a packet of sweets open in front of children.
This is a dilemma for many photographers: should they sacrifice the visual integrity of their image, at the risk of altering its impact or aesthetics, or accept making it more vulnerable to theft by putting it online without any protection?
By visibly marking your image, you clearly show its ownership and reduce the likelihood of it being reused.
Professional photo processing applications often include the option of inserting text and/or a logo into the image, as do small applications dedicated to this task alone.
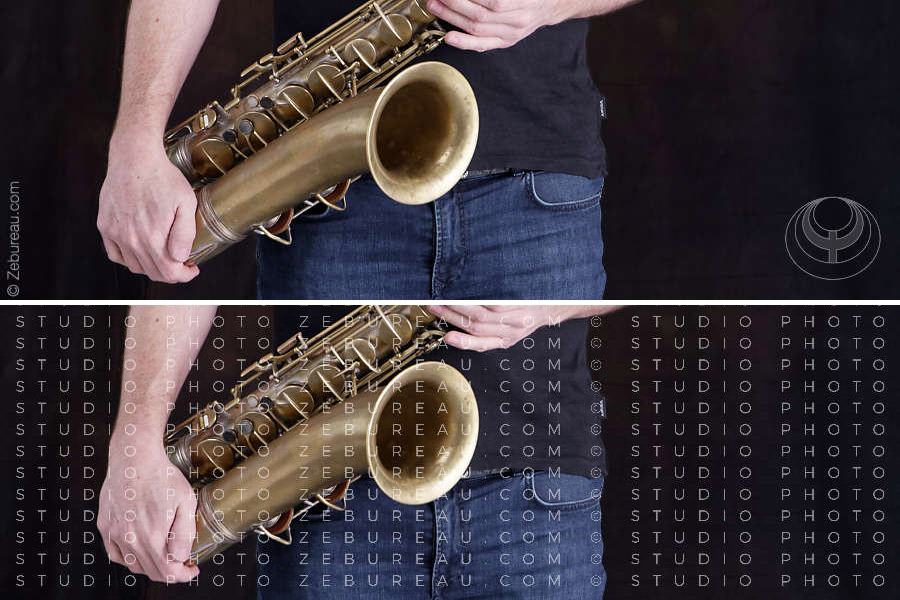
Fill the image with a text watermark in the form of a seed, as in the second image above: this is an extreme solution, mainly used to protect images sold online.
Note: in this blog, you will only find one example of an image treated in this way, because of its uniqueness, in the tutorial on creating a panoramic of the Centre Pompidou.
The expert’s solutions:
– Watermarks, which are most often placed in the corners of images, can be removed by cropping (see the survey in part 2 of this tutorial) or by using a photo retouching tool.
– Tools using artificial intelligence can now also be used to delete text inside an image…
2- Include a copyright in the metadata of your images.
Any photograph posted online should at least include a copyright notice in its metadata.
While this axiom has no direct impact on image theft, it is one of the ways in which it is easier to claim parentage of a stolen photograph.
A well-informed photographer can set up his camera (or image processing application) so that his name, copyright or other information can be found in the metadata of his images.
To date, in terms of search engines, only Google displays copyright details, if these have been correctly integrated into the photographs.
This important indication, which is displayed below the enlargement of the selected image, may make some Internet users hesitate to appropriate it here and republish it on their own account.
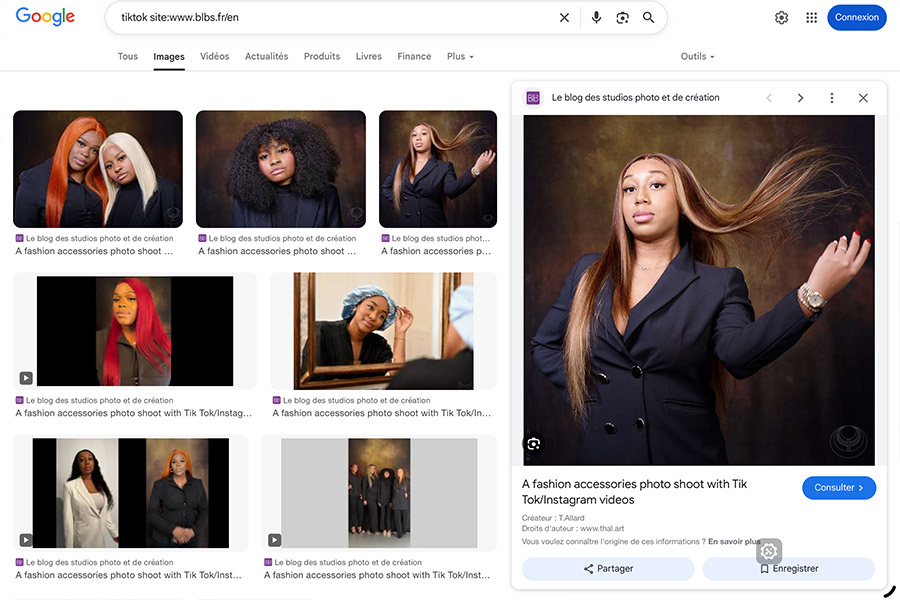
As for the majority* of social networks such as Instagram, Linkedin, TikTok, X (Twitter), etc., they are, unsurprisingly, the least respectful of copyright, since they systematically remove this metadata from every publication, thereby encouraging the theft and re-use of our images.
*Only sites dedicated to photographers, such as Flickr or 500px, retain this metadata.
The “Meta error” to avoid on your website
Most image optimisation tools, added as extensions to CMSs such as WordPress, tend to remove metadata.
This is one of the reasons why it is advisable to optimise your images yourself (see tips 4 and 5).
To check whether your online images include a copyright notice, there are browser extensions or small specialist applications that display the metadata.
Note: it is possible to set up another type of hidden identification, such as an invisible digital tattoo, which can resist re-registration or republication of an image on social networks.
IPTC, XMF and EXIF, which metadata format should you choose?
Google images recognises the IPTC standard in jpg images by default.
For any other image or metadata format listed below, we recommend that you carry out a referencing test beforehand.
- JPG: fully supports IPTC, EXIF and XMP .
- WebP: does not natively support IPTC; enter the copyright in the XMP (or EXIF) metadata so that it is taken into account.
- PNG: supports XMP and sometimes IPTC, but IPTC compatibility is less universal than for JPG.
3- Clearly display your copyright
The vast majority of Internet users are sensible and honest, so displaying a text insert stating that your images are not free to use without your permission is often enough to inform them, dissuade them from re-using them on their own account or encourage them to contact you.
©The studios blog : external links to this article are authorised and appreciated, but any use of textual content or images from this site is subject to authorization.
This is a fairly effective way of avoiding images being ‘borrowed’ through ignorance of copyright.
You can also indicate your copyright notice in the caption to each image, as most online press sites do.
Note: this is also a very effective way of getting search engines to associate your name with your photographs.
4- ‘Degrade’ the quality of your images with high levels of compression
Limiting, to a certain extent, the intrinsic quality of an image intended for the screen does not alter its visual perception.
Above all, it helps to reduce the opportunities for an image thief to reproduce it on a larger scale, or to resell it in the form of a photo print.
When exporting your jpg (or webp) image for the Internet, it is important to use an application that allows you to choose the level of compression.
Applying a value between 50 and 70 out of 100 is still qualitatively very acceptable on screen (as you can see with the other images on this blog).
The expert’s response: There are AIs capable of significantly improving an image, even a degraded one…
5- Limit the publication size of your images in pixels.
Some photographers, through ignorance, publish their images online in resolutions that are too large for the screen display of their site.
And yet, reducing the size of your image before putting it online to match its actual pixel display as closely as possible is vital to avoid encouraging piracy.
t’s easy to understand that the larger an image, the easier it is to reuse on different media.
The choice of publication size can be a difficult one, because while a small image size – for example, less than 500 pixels – reduces the interest in stealing and reusing it, it also has a detrimental effect on its display on your site!
If you want to protect your photographs from theft on the Internet, you should certainly never exceed 1000 pixels on their larger side, including on social networks.
In this blog, which is largely devoted to photography, we’ve chosen to keep the size of images on the screen to a respectable 900 pixels.
6- Superimpose a transparent element over an image
In this sixth tip and the next, we’ll look at a development technique linked to visual rendering on your website.
This first developer trick consists in placing an empty <div> above the image, making the right-click inoperative to directly save the image visible on the screen.
This solution is often used by image banks (even if it only discourages amateur image thieves).
The expert’s response: there are many other ways of saving an image from a modern browser.
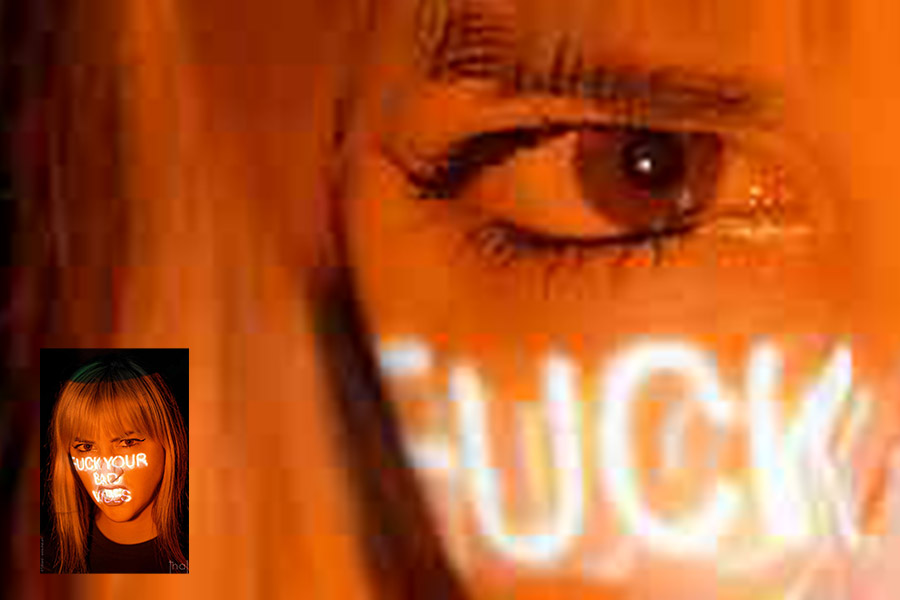
7- Dividing an image into several overlapping parts
A background image, referenced but incomplete or altered (perforated, watermarked, etc.), is judiciously placed under one or more pieces of cropped images (in png format) which modify its appearance on screen, only on your site.
This slicing of an image into several layers could be one of the biggest deterrents to image thieves visiting your site, forcing them to piece together a real puzzle… if it weren’t for that pesky screenshot.
Nevertheless, even if it seems complicated to apply it to all the images on a site, this display technique proves very effective against the theft or remote use of an image:
- It’s a way of thwarting the image-snatchers who help themselves directly to Google’s results, or to those of an Artificial Intelligence engine like perplexity.ai, without even visiting your site!
- It undermines the practice of “hotlinking” explained in Tip 8 below.
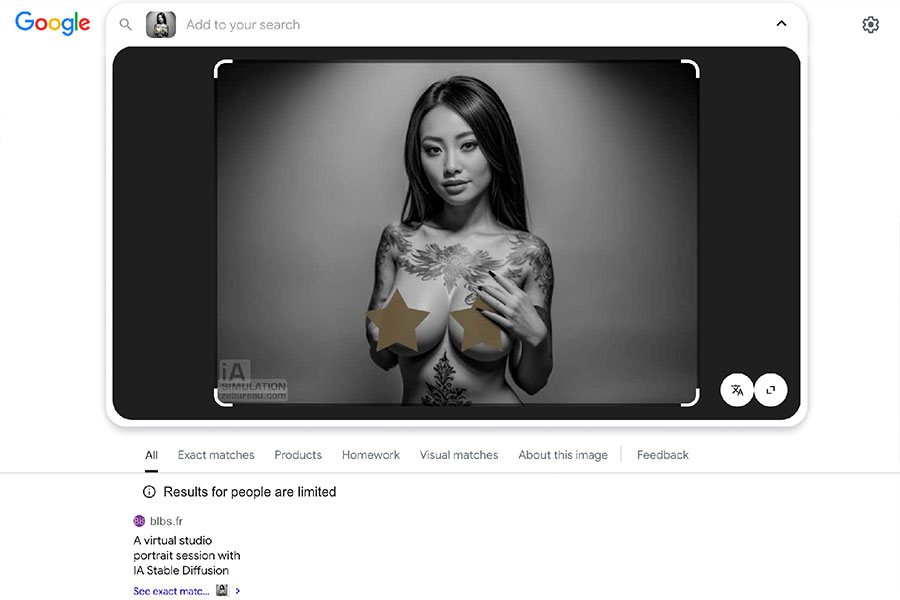
An example of the targeted use of slicing
This image cropping technique was used in an article on this blog dedicated to portraits created with Stable Diffusion for rendering AI with explicit content, to protect against “booby snatcher“. Breasts, visible in one of the portraits, will never appear in search engines, as the main image placed on the lower layer incorporates more prudish stars instead!
8- Prevent direct access to your images via external sites
Hotlinking” is a hacking technique used by third-party sites that link directly to your image url to display it on their site.
This allows them to save bandwidth and take advantage of your hosting.
These are, more often than not, sites that have a limited lifespan but are trying to sell your images online!
To prevent this practice, it’s best to identify these sites in advance (see section of tutorial on a technique for tracking down hotlinking).
For example, the code you need to insert in your site’s .htaccess to protect yourself from the “thiefimage.com” site would look like this:
RewriteEngine On
RewriteCond %{HTTP_REFERER} ^https?://(www.)?voleurdimage.com/ [NC]
RewriteRule .(jpe?g|png|gif|webp)$ - [F,NC,L]
With this technique, you can block access to your images on as many sites as you like, including discussion forums that allow this practice.
Expert advice:
– To give toxic sites a run for their money, you can display an image of your choice in place of all your pirated images.
– An advanced technique is to prevent hotlinking for the entire Internet, and allow images to be displayed only on your site and on a list of selected sites or search engines.
9- Block the referencing of your images
Prevent the discovery and theft of your images from search engines.
This radical solution consists in putting a specific code at the root of your site in the .htaccess file (preferable to the robots.txt file) to prevent search engines from referencing your images, but this can cause you to lose many visitors!
10 – Block AI training on your images
Artificial intelligences are currently the most formidable and effective image thieves on the planet, because they copy absolutely every photograph they come across and then regurgitate it in another form, making it impossible to identify the original images…
One solution is to ask them not to train their models on your creations, but you can never be sure that they won’t do it anyway!
This means adding specific rules to the robots.txt file at the root of your site, to block indexing robots from known AIs.
For example, for OpenAI’s GPTBot, add :
User-agent: GPTBot
Disallow: /
Expert advice: you can also block AI robots more effectively in your site’s .htaccess.
By applying at least the first five tips in this tutorial on formatting your images for your website or social networks, you’re already laying the foundations of a theft-deterrent strategy – without, however, being able to eliminate theft altogether.
The next logical step, if you want to go further in protecting your copyrights, is to learn how to identify fraudulent uses of your images.
This is precisely the subject of the second part of our dossier on image theft on the Internet, with the tutorial “How to track down image thieves on the Internet”.


This post offers clear idea for the new users of blogging, that really how to do blogging
and site-building.
Thank you for this very interesting article.